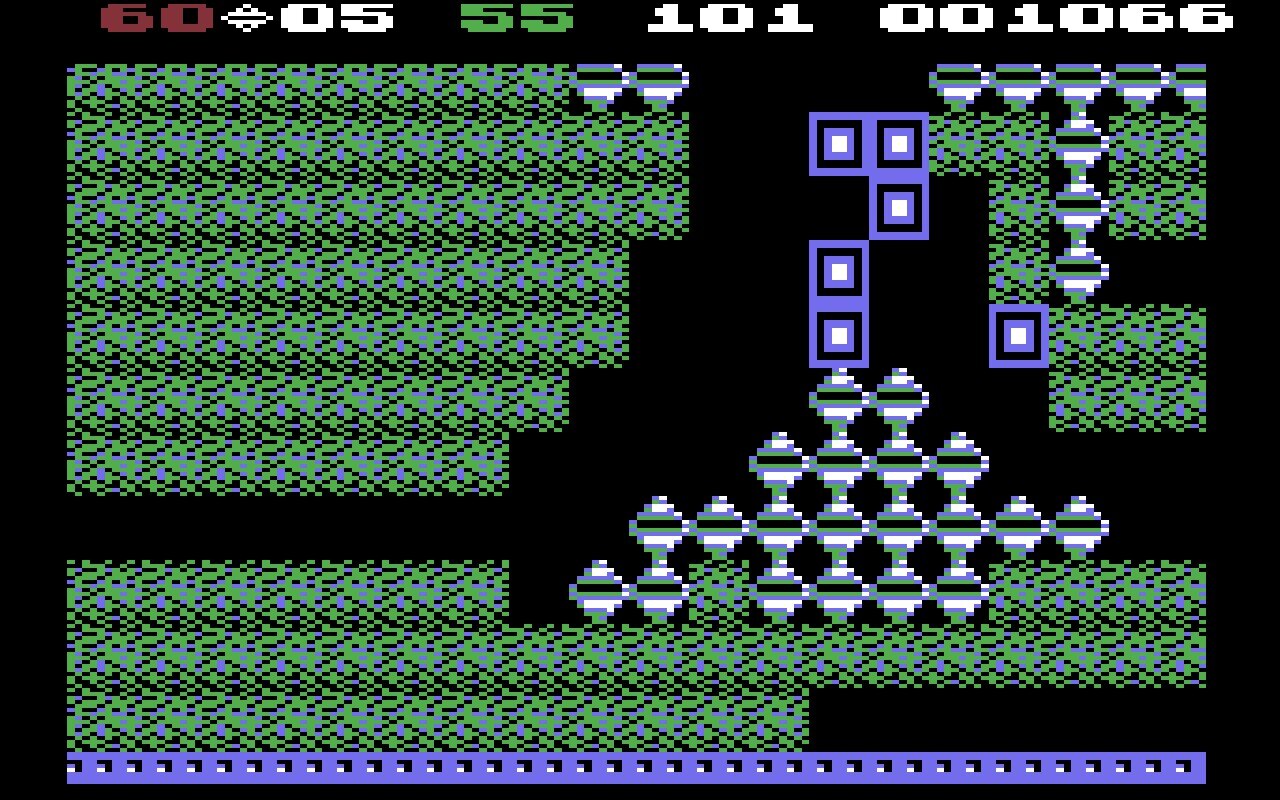
Even after putting an ungodly amount of hours into Hades, discovering the joys of The Swapper and replaying Portal, getting Boulder Dash – a modest home computer hit in the 80s, but a childhood obsession of mine – to run seamlessly on the Steam Deck, felt like peak Deck.
How apposite to link the Steam Deck up to the Commodore 64. In the 1980s the Commodore 64 was the home computer that took the fight to console town. It was packaged so as to be accessible – also if all you wanted to do was game on it – but it was a computer, open to tinkerers, not a locked down console. The Steam Deck feels very much of that same spirit.
This post is going to detail how to run and configure the VICE component of RetroArch, i.e. the emulator needed for C64 games, in general but with a particular emphasis on making it work for the Deck’s controls and Steam Input. I found it easier getting used to RetroArch and it’s user interface while sitting at a desktop setup, so I definitely recommend at first either hooking the Deck up to a mouse, keyboard and external display – or trying this out on a regular gaming computer first.
Why RetroArch and not just plain VICE? The short answer is UI. Once you get set up, Retroarch is so much more Deck friendly than the VICE project’s x64 program that very much presumes mouse and keyboard. And as indicated by the name of the component, the underlying emulator engine is the same.
Install and cores
A core, in RetroArch parlance, is a game interpreter. When installing from Steam, cores are DLC that should be added in Steam. RetroArch also has it’s own distribution of cores and other modular parts for use when not installed through Steam, though I would advise against mixing the two. In order to play Commodore 64 games, I added the RetroArch – VICE DLC to my “purchase” (it’s free, like RetroArch itself) under the CONTENT FOR THIS GAME DLC list on RetroArch’s Steam Store page.
I say core = DLC but that’s not quite true. The VICE DLC adds multiple cores covering multiple Commodore models, including the VIC-20, Commodore 128 and even the PET (!) But there are also at least three cores covering the C64 in what appears to be slight build variations on the same codebase. As will be apparent in what follows, I just picked the first in the list. Since it worked, I never investigated further.
Setting up a games library
The easiest way to build and maintain a games library in RetroArch is to have it scan a directory containing game files and have the discovered games added to your library, ideally associated with the correct core.
First, I want to set the default directory in file browser settings. If I need to use the file browser multiple times, navigating to a specific spot from root over and over again gets annoying. The setting for default starting point is found under Settings > Directory > File Browser. This also serves as a neat introdution to a recurring experience in my time with RetroArch: A very confusing settings hierarchy. Understanding why some options are under one heading and others under another will seem to require memorization, routine and immersion rather than strict logic. If, for instance, you accidentally go to Settings > File Browser instead, you will find the option to have the file browser start at the last used directory.
Now, to add the files I go to Import content on the main left hand menu. There are three ways to do this, the first two of which match files against a database. This – I think – has the advantage of adding thumbnails and metadata and generally making your library more appealing. I say “I think” because I haven’t seen it work yet, despite the database file for the Commodore 64 being present and correct. If this representation of the database contents is to be believed, though, I think the answer sadly is that the database for the C64 is just not very good. Most of the games I found in the list were obscure educational games, and there just weren’t that many games in it to begin with. Strengthening this suspicion is the fact that the binary database file for C64 is 46 kb against a 706 kb database for the Amiga. I don’t think that 1:15 relationship reflects the true proportion of the two games libraries. Rather, it seems simply to show that the Amiga fanbase is still going strong while C64 nostalgia is just that: nostalgia for times gone by, not an active scene.
So instead, I am going to pick option 3, Manual Scan, which will not check against the database but will add each and every unit found as a game. So obviously, there should be no other content than C64 games in the directory. I say unit here because all of my game files are zipped into one-game-one-zip-file. I suspect I could simply decompress the archives and have the resulting folder recognised but using archives works as long as the option (under Manual Scan) called Scan Inside Archives is enabled.
Apart from that setting, the important bits are a) naming the “playlist” that will get added to the main menu from the scan (confusingly the option is called System Name), and b) Default Core which specifies which core the games found will be associated with by default. I am in no position to judge the respective merits of the various VICE cores but VICE x64, fast has worked very well for me and is what I am going to be using in this. I should also note that using archives means that any files added during gameplay are discarded when you quit the game. So if you need persistence, you will want to work out how to work with non-archived games.
Finally, I just hit Start Scan. Manual scanning with no database lookups is really fast even when adding tons of games from a microsd card, so don’t pay too much attention to the warnings about slowdowns.
Controls configuration
I sometimes feel that trying to understand controls mapping in RetroArch requires you to melt down your brain and recast it a couple of times – and it’s about as pleasant. So if I don’t do a better job of explaining it than any of the guides I myself have read, I apologise in advance for any pain and suffering inflicted.
If you have a Steam Deck, there’s fair chance you’ve tried configuring Steam Input for the Steam Deck or a Steam Controller. While that’s no picnic either, at least the mapping aspect is simple: You map one device onto one other. The A button on the Steam Deck is translated into the A button of an Xbox360 controller. Or the spacebar of a keyboard. Etc. I push a button on my Steam Controller and the game gets an input from a device I have selected.

Mapping the Steam Deck controls to retropad
With RetroArch you have two levels of abstraction instead of one. First, your input – in this case the Deck’s controls – are mapped to an imaginary device called the retropad. Then the retropad is mapped to a core specific controller device.
Imaginary device? I’ll start with what, then move to why. A retropad is sort of a generic abstract of various controllers. It has a d-pad, it has ABXY buttons, it has two analog sticks. It has two shoulder buttons and two triggers. It is much like an XboX360 controller and so it’s easy to find analogues for many of the Deck’s controls. So easy in fact that it is done for you.
Go to Settings > Input > Port 1 Controls. Under Device Index you should see Steam Virtual Gamepad. And then follows the mappings. On the left-hand side you have the retropad’s buttons and controls. On the right-hand side what Deck controls match that sort of input. Again, an A button for an A button, a shoulder button for a shoulder button. Obviously, the Deck has more controls than that but here it’s just about matching the retropad’s limited repertoire. Mostly, my recommendation is – assuming that the Steam Virtual Gamepad has been recognised and set up for you – to leave everything as is. The retropad emulation setup does not use the Deck’s back buttons (L4, L5, R4, R5) but that just means that we can make use of them via Steam Input later on. If you don’t see Steam Virtual Gamepad it’s probably because you have some other controller-like device attached and Steam Virtual Gamepad has been pushed to another Port X Control setup. Check ports 1 through 5.

So far so good. But what do you need retropad emulation for? If you look at the mappings you can see that the Deck’s D-pad is now mapped to the retropad’s D-pad. But a Commodore 64 does not accept a “retropad” as input. It knew joysticks and keyboards; it certainly never knew what a “D-pad” was.
So this physical-device-mapping-onto-retropad now has to be complemented by a mapping of the retropad to a joystick. Since a joystick is much simpler than the retropad, this will really mean picking one of several options for moving the joystick and one of several options for pressing the fire button. Or just “Button” as I have seen a few game call it. Imagine! A simpler time, indeed.
However, I am getting ahead of myself. Mapping retropad-to-joystick is neither done here (in Settings > Input) or now. Before we go there, I want to try (with emphasis on try) to explain why this is set up in this two stage manner.
I think it’s because you have now configured a device that can be used across cores. If you want to use your physical controller (the Steam Deck controls) to emulate a Sega Dreamcast controller and Playstation Portable controls in addition to a C64, you can recycle the physical-device-to-retropad mapping between cores. Let’s say you always want to swap left and right for analog sticks, shoulder buttons and controllers – for some idiosyncratic reason. Once you have changed the default Steam Virtual Gamepad mapping this will now automatically work for all your cores, assuming they have concepts like left and right analog sticks etc. Furthermore it give users more common ground when it comes to controller configuration – and problems with controller configuration. Very few people are going to have Steam Deck controls that they want to use for emulating a C64 joystick. But there are sizable crowds of both Steam Deck users and people emulating C64 joysticks. It’s easier to get help if you can break the problem in two, one for each group. Finally, it probably also makes the developers’ jobs easier. However, all of this is just speculation.
Mapping the retropad to a joystick
So, how do we configure how our Steam Deck-as-retropad should be used as a joystick? Is there a C64 specific subsection of Settings for that? No. Core specific options are set when the core is running and only then. This can be when a game is loaded or just when you boot up the core’s default state.
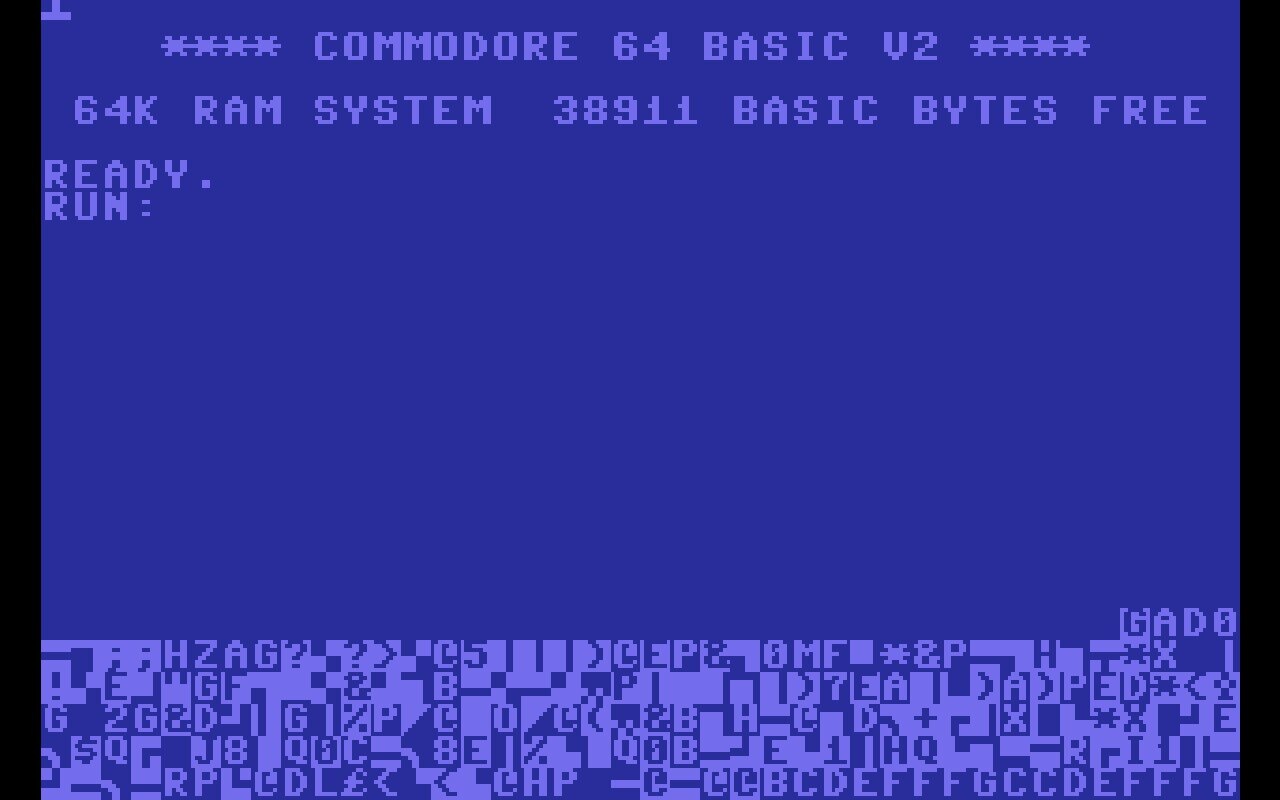
The latter is done from Main Menu > Load Core and picking Commodore – C64 (VICE x64, fast). After the core is loaded, press Start Core and you should be reacquainted with the two-tone C64 start screen.
Luckily we don’t actually need to do anything here, seeing as I’ve long forgotten the rituals of loading games from tapes or programming BASIC. We just need the core running so RetroArch knows what core we are now setting options for. To set those options, we need to get to the Quick Menu. So press F1 for that while on the Commodore start screen. I should stress that’s the PC F1 button by the way, not the Commodore 64 F1 button, in case you have discovered that the Deck’s Select button (the leftmost of the two tiny menu buttons at the top of the face of the Deck) gives you access to a virtual C64 keyboard. We’ll revisit that keyboard later.
Don’t have an physical F1 button on your Steam Deck? Well, then I guess it’s a good thing you have four back buttons that nothing is claiming and a friend in Steam Input. I like to bind L4 to F1.
While in the Quick Menu, the C64 emulation continues in the background. This, the emulator running and what it is running, is now considered “Content”. So the Quick Menu has options to Resume, Restart or Close the Content. “Closing the content” is equivalent to turning off your Commodore 64. Leave it running for now.
On the Quick Menu go down-down-down to Controls > Port 1 Controls. On the left-hand side you once again have retropad buttons. But now, you’re not mapping them to a physical device, you’re mapping them to a C64 joystick.

Except… that the options you can pick for say, the retropad’s “Left stick up” setting, don’t look very C64-ish. If your capacity for complexity and abstraction is just about full, I’ll say ignore that and just do this: Assign the C64 joystick controls (right hand side) Up, Down, Left, Right and B / Fire to the retropad (left hand side). These are your basic joystick controls.
By default the joystick directions are assigned to the retropad D-pad (which maps onto the Steam Deck’s D-pad). My recommendation would be to supplement this by also assigning them to the retropad left analog stick which are called Auto: LS xx (axis), where xx is the direction. That way you always have two joysticks available, one discrete and precise, one more fluid and easy. I would also suggest putting fire on the retropad right hand trigger, called Auto: R2 (axis). By default it’s on the retropad’s B button which, confusingly, is the Steam Deck’s A button.
Ignore the fact that you’re able to pick things like Left Analog X – on the right hand side. You most likely don’t want that as a C64 input, just the five above.
Once you’re satisfied, go back one step (Quick Menu > Controls) and click on Manage Remap Files. Here you will want to Save Core Remap File. Your port controls will then be applied whenever that specific core is active. If you’re running a game in the background rather than just a started core, you should also be able to save your changes as a game specific remap. Note that you should not need to explicitly save further changes to the remap – those should just be auto-saved to the core remap (unless you have a game specific remap active, then that soaks up the changes). Beware, that deleting a remap doesn’t just remove it from a file on disk, it completely resets your current remaps to default.
Controllerception
If you can stomach more controller abstraction, we can actually access one more level. Remember those not-very-C64-ish controls we could assign to the retropad? Like L2 or X. Those do actually do stuff on VICE cores. But it’s obviously not sending L2 or “Left Trigger” as a signal to the C64 emulation – they have a specific meaning to C64 core that is interpreted before it hits the game itself. The retroarch docs have a table of their default meanings.
Can those defaults be changed? Yes. Where can they be changed? Well, obviously not anywhere near where we’ve already been. That would be too easy. But before we change anything, let’s take a look at some of those defaults and what they’re good for.
- L2 is interpreted as RUN/STOP or R/S. This is a useful C64 button as especially some … modified games may ask you to push it to advance.
- R2 is Return. Might sometimes work as a way to end high score entering. Or just navigate to the Rt on the game’s virtual keyboard.
- X means Space to the VICE cores. Both a common game menu navigation button and sometimes a secondary fire, e.g. Space triggers a (plane) roll in 1942.
- The Select button get the C64 core to pull up a sort of in-engine-looking virtual C64 keyboard. Very handy as some games require hitting special characters to proceed, e.g. to go from title screen to menu screen in Boulder Dash, you need to hit F1.
If the preceding sections hadn’t made it clear, it is absolutely crucial not to confuse different levels or PC controls with C64 controls.
For instance: When I talk of Space in the list above, I am talking about the equivalent of hitting the spacebar on an actual, physical Commodore 64. This bears absolutely no relation to hitting the spacebar on the PC running RetroArch (or an attached USB keyboard, or simulating a spacebar press via Steam Input). The PC space key is instead a hotkey that by default speeds up the emulator like, I dunno, 50 times so you can skip by loading sequences quickly.
Similarly, when I talk of entering F1 in Boulder Dash, it is the C64 F1 button/input I’m talking about, not the one on the PC keyboard / Steam Input. As noted at the beginning, F1 on the PC level triggers the RetroArch overlay / Quick Menu.
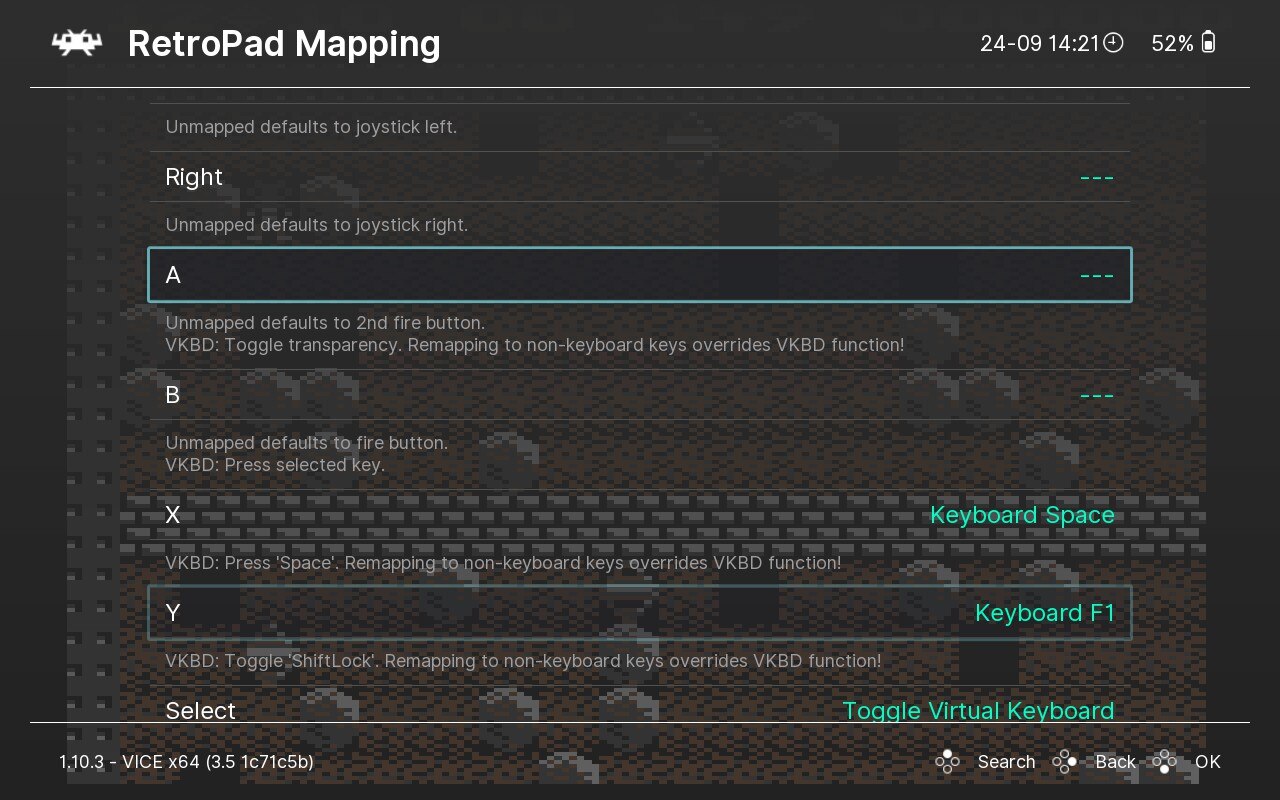
I promised they could be customized, so let’s get back to that. Since these settings are core specific, we should still have a core running in the background, and we should stick to the Quick Menu, as Settings are where global options live. Go to Quick Menu > Options > RetroPad Mapping. Here I would advise against messing with the meaning of the controls we have already assigned in the previous section, i.e. Up, Down, Left, Right and B / Fire as that is just inviting chaos.
What RetroPad Mapping is good for is assigning some useful C64 keyboard keys to unused retropad buttons. Like C64 F1 to the retropad Y button, for instance. Bear in mind, though, that you don’t need to map every C64 key you will ever need. As mentioned Select should by default be linked to Toggle Virtual Keyboard, from where all C64 keys are available. Though obviously you don’t want to open a virtual keyboard and locate the spacebar in order to dodge oncoming enemy planes…
Side note: RetroArch does have an option that allows for “pass-through”, i.e. sending keyboard events straight to the core, rather than having RetroArch intercept them. Disclaimer: I haven’t tested it, and I don’t know if it works with VICE cores. Just because keys have the same letters on them doesn’t mean that scancodes and keycodes are the same. Unless I was trying to write a program in Basic on the machine in RetroArch, I wouldn’t touch this option with a tenfoot pole.
Hotkeys
Room for more keyboard customization? RetroArch has some handy hotkeys, some of which I have already mentioned in passing, like Space for speed-up and F1 for Quick menu. Do note that these are on a very different level from that we have just visited, not so much interacting with the emulation as with RetroArch the application.
Except… Well, you will probably not be surprised to learn that hotkeys also come on two levels, global and core specific. Let’s take core specific first.
Core specific hotkeys are inspected or customised at Quick Menu > Options > Hotkey Mapping. These are not all that useful to casual users as most of the interesting functions, like toggling an in-engine statusbar, toggle turbofire or switching joyports – i.e. virtually plugging your joystick into the other joystick port when a game idiosyncratically insists on using port 1 instead of port 2 – are also available from the virtual keyboard as STBR, TRBF and JOYP. However, they can be assigned to keys on your PC keyboard.
Global hotkeys are located at Settings > Input > Hotkeys. Here you will find hotkeys that work across cores, like saving game state, screenshotting, quitting content or RetroArch etc. With a standard PC this would be a useful place to set something like Save state to an easy to reach key or F5 because of functional similarity to quick save. Since the Steam Deck does not have a keyboard attached, it’s more a place to note the keys and then map them to Steam Deck controls using Steam Input.
Speaking of which. I am not going to go through using Steam Input but it is worth repeating that the retropad takes over all Steam Deck controls except for the gyro, the touchpads and the back side buttons (L4, L5, R4, R5). So my personal preference is to only reprogram those using Steam Input. With all these level and abstractions it is very easy to make a confusing mess of things.
Here are some suggested candidates for back buttons:
- F1 (Quick Menu / overlay)
- Escape (double tap to quit RetroArch)
- Space (fast forward or speed up emulation, useful for faster loading times)
- F2 (save state)
- F4 (load state)
Other configuration options
Since controls are such a heavy topic I haven’t really dived that deep into other settings. Also I don’t have strong opinions on things like color reproduction. I would say that the only essential option that isn’t on by default is enabling crop. Sure, there is a retro charm to the C64 border but the Steam Deck’s screen is small enough as it is. This is a core specific option, so keep one running, while going to Quick Menu > Options > Video > Crop (and not Quick Menu > Video Layout!) Automatic and Maximum have produced the same results in my experience. The default Crop Mode setting Horizontal + Vertical have worked fine for me.
Note that there is also a hotkey that is supposed to be able to toggle the border on and off but so far I haven’t been able to make it work. So I will stick with it permanently set to off.
Steam Deck specifics
Apart from the aforementioned issues with not having a physical keyboard and configuring Steam Input appropriately, there is really only one thing I want to comment on regarding Deck specifics.
The Deck’s quick settings menu has a Performance tab with caps on framerate and refresh rate. My default profile has set refresh rate to 40. This caused the C64 cores a lot of grief, stuttering and nasty, broken sound. Limiting it to 51 seems ok but unless you know your PAL from your NTSC it might be better to just leave both framerate and refresh rate at their default 60. Regardless of default settings, I think it’s advisable to create a game specific performance profile just for RetroArch.
Watts seem perfectly OK to restrict but then it doesn’t really go over 8 W anyway, so I don’t know if there’s much point.
Conclusion
All this fiddly and painstaking work begs the question: Is it worth it to get to replay some 40 year old games? Well, let’s establish a baseline first…
…normally I consider nostalgia to be a toxic impulse. It is the twinned, yearning delusion that (a) the past was better (it wasn’t) and (b) it can be recaptured (it can’t) that leads at best to bad art, movie versions of old TV shows, and sad dads watching Fox news.
John Hodgman: Vacationland – True Stories from Painful Beaches
I agree with most everything John says. I am guessing though that the quote contains a “but” that didn’t make the cut from where I sourced it. Because if not indulged in without restrictions, it is more like an alcoholic beverage than pure poison: Something to enjoy responsibly.
When I finally did get Boulder Dash to run and respond and hearing those dulcet bluh-blah tones, I was ecstatic. Partly because, yay, I got something working that didn’t work before, but mostly because it was a big, delicious gulp of nostalgia.

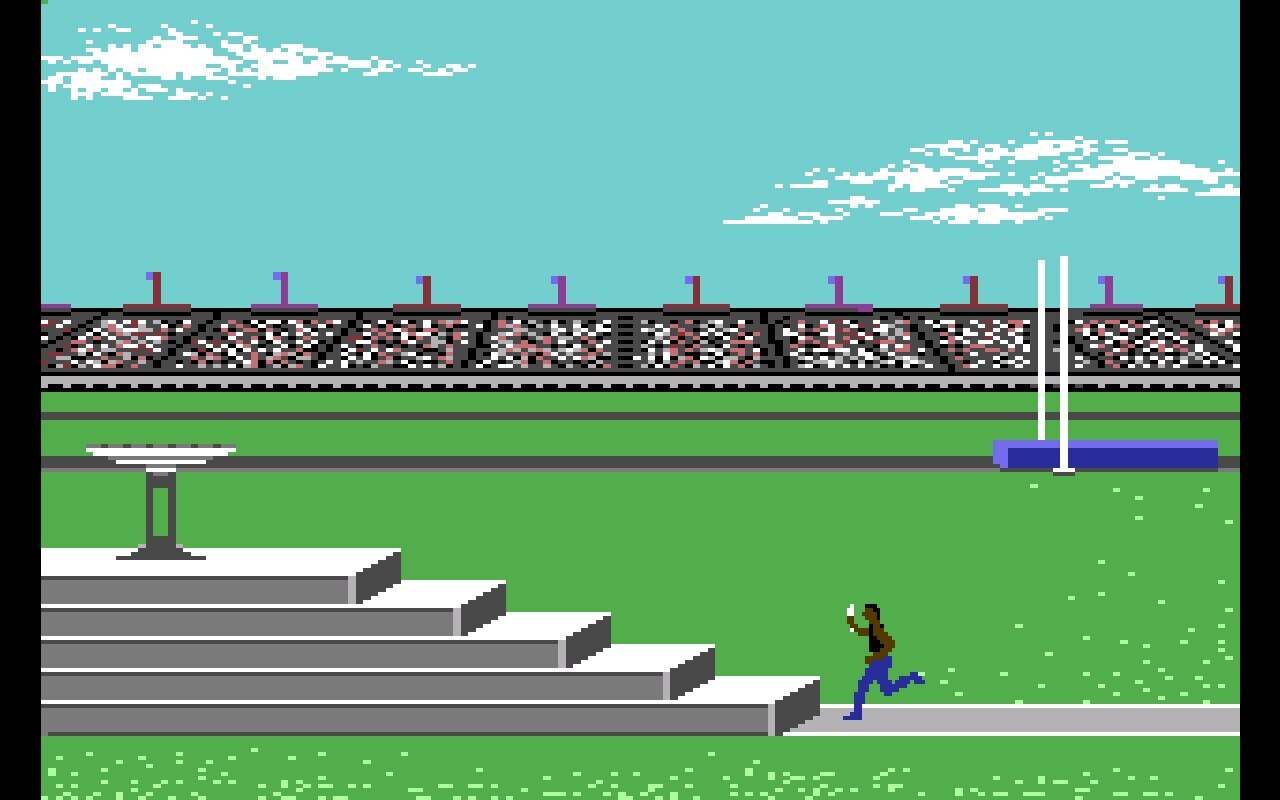
I do think games from “back then” have lessons to teach today’s game developers, mostly in the less-is-more department. The – absolutely unintentional – sparseness, even starkness of the graphics is striking and dare I say, beautiful. The complete lack of noise, branding and advertising in something like Summer Games makes it feel eery and strange but also solemn and intriguing, in a way no sugar-drink fueled sports game today would even consider. Agua!
Do I think that games from back then were better than those we have today? Heck no. I still think Boulder Dash is an underrated masterpiece in the action puzzler genre and I’m still gonna play it loads, now that I’ve got it back. But it will be a new experience with a tinge of memory, not an attempt at recapturing some not-so-glorious glory days. And ultimately, I will have had my fill and return to present day games. If my XCOM 2 WOTC campaign ever finishes, that is.